Cute Teddy Bear Cookies (Gluten-Free). Admit it - these are just about the cutest little cookies you've ever come across, right? We have to hand it to the folks who came up with these - that amazing added touch of the teddy bear holding onto a single nut is almost too adorable to believe. Simple, effective and a breeze to make at home with no. TEDDY BEAR COOKIES - Recipe Video. Remember, all foods can fit as part of a balanced diet, including cookies!
 As a tip, practice mindful eating by taking your CHEWY SWEET POTATO RAISIN COOKIES 🍠🍪 Gluten Free + Low Fat.
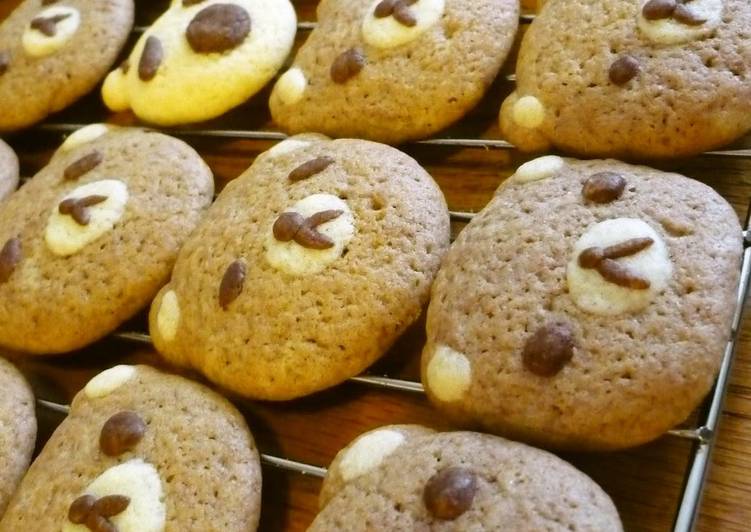
These adorable Teddy Bear Cookies melt in your mouth with buttery sugar cookie flavors!
Perfect for Game Day and holiday celebrations!
You can have Cute Teddy Bear Cookies (Gluten-Free) using 9 ingredients and 14 steps. Here is how you achieve that.
As a tip, practice mindful eating by taking your CHEWY SWEET POTATO RAISIN COOKIES 🍠🍪 Gluten Free + Low Fat.
These adorable Teddy Bear Cookies melt in your mouth with buttery sugar cookie flavors!
Perfect for Game Day and holiday celebrations!
You can have Cute Teddy Bear Cookies (Gluten-Free) using 9 ingredients and 14 steps. Here is how you achieve that.
Ingredients of Cute Teddy Bear Cookies (Gluten-Free)
- You need 150 grams of ☆Rice flour (Joshinko).
- It's 50 grams of ☆Almond flour.
- You need 100 grams of Butter (unsalted).
- It's 60 grams of Powdered sugar (or caster sugar).
- It's 5 grams of or more Cocoa (unsweetened).
- You need 1 large of egg.
- It's 1 tsp of Baking powder.
- You need 1/2 tsp of Baking soda.
- Prepare 1 of Vanilla essence.
These cookies are so much fun, whether it's for a party, potluck or holiday. Gluten-free doesn't have to mean cookie-free. Substitutes and creative adaptations yield delicious results. These gluten free peanut butter blossoms are a staple dessert during the Christmas season and are everyone's favorite cookie!
Cute Teddy Bear Cookies (Gluten-Free) step by step
- Bring the butter to room temperature. Sift the ☆ dry ingredients (or you can omit this). Beat the egg..
- Put the butter in a bowl, and cream it with a whisk. (If the butter is too hard, microwave for about 15 seconds.).
- Add the powdered sugar to Step 2, and mix until it turns white. (It's ok if it's roughly mixed together.).
- Once mixed together, add the egg, and mix further. The mixture may separate to start with, but it will blend together as you keep mixing..
- Add the ☆ dry ingredients into Step 4, and fold in gently using a rubber spatula..
- To make white dough and brown dough, divide the dough into 90% and 10%. Add the cocoa to the bigger batch..
- Take out 10% of the cocoa dough and add more cocoa to make dark brown dough. (For eyes and nose.).
- Wrap the dough with cling film and let it rest for more than 30 minutes in the fridge..
- Start preheating the oven to 180°C before you start shaping the teddy bears..
- Take out the dough from the fridge, and shape it into teddy bear's face as you like. The photo shows the parts I made for my teddy bear cookies..
- Bake at 180°C for 10-12 minutes. The cooking time differs depending on your oven, so adjust accordingly..
- Once they are baked, place on a cooling rack, and cool them a little. Then they're done!.
- If you have leftover white dough, why not make koalas or pandas with it?.
- I made other kinds of animals as well. The bunny was the easiest..
As you can see, the teddy bear cookie idea evolved into something a little different. These cookies were abolutely adorable and fun to make. I made teddy bear heads and frosted on accessories and added mini chocolate chips for eyes. cute. The cutest little hugging teddy bear-cookies, that's what! We have never seen anything more charming and endearing than these golden brown teddies hugging almonds as if they were their own teddies.